Reflect in a blog post on your portfolio site: with a year of Vivero experience under your belts, what advice do you have for new Fellows about the idea that this job involves learning how to do your job on the fly?
Looking back at my time as a Vivero Fellow, the biggest takeaway for me is that a huge part of this job is learning how to do it as you go. When you start working on a project, whether it is building a website for historical research or managing tech logistics, you are rarely going to know how to do everything right away.
If I could give any advice to new Fellows entering the program, it would be to not be afraid to try new things and make mistakes.
When you are learning a new tool or coding a new digital space, things are naturally going to break. In my experience, making mistakes is actually the best way to learn. Figuring out why something didn’t work teaches you much more than getting it right on the first try.
You also need to be confident in your ability to figure things out. No one expects you to be an expert on day one. Half the job is just having the confidence to look at a software, platform, or problem you have never seen before and trusting that you can learn it. Don’t stress when you run into something unfamiliar. Just take it one step at a time, and you will adapt!
The most important thing I’ve learned this semester is that being a Vivero Fellow is way more hands-on than I expected. Coming in as a CS major who’s more interested in software than physical objects, I thought I’d mostly be helping people with coding or website stuff. Instead, I spent a lot of time learning how to use 3D printers, sanding prints, and writing descriptions for a physical display. I realized that digital scholarship isn’t just about the digital part.
If I could give advice to past me, it would be to not be afraid to just mess around with things. I was really cautious at first with expensive equipment, worried I’d break something. But you learn way more by actually using the tools and making mistakes than by just reading about them. Also, ask for help sooner. I wasted time trying to figure things out on my own when I could’ve just asked someone who already knew (aka Max).
Another advice I would give is to not sand too quickly because otherwise your hand will burn… lessons were learned the hard way.
I think the training model worked pretty well overall. I liked having a task every month.
I will be abroad next semester so I won’t be here unfortunately… but I do plan to come back afterwards!
For future exploration, I’m considering learning Blender more seriously. 3D modeling seems like a natural next step after all of the 3D printing I’ve done! I think being able to design my own models instead of just printing other people’s files would be pretty cool. I’m also interested in accessibility and inclusive design, especially after writing those display descriptions and thinking about how to make technical information approachable for everyone.
This semester pushed me outside my comfort zone in a good way. I came in thinking I’d mostly do software stuff, and I’m leaving with actual making skills and a better understanding of what digital scholarship really means.
The documentation I created are the descriptions for the 3D print display items. This is a different kind of documentation than the usual “here’s how to use this tool” because these descriptions are meant for anyone walking by, not just future Vivero Fellows.
My approach to documentation is honestly pretty chaotic. I write things when I feel like it, which isn’t the most systematic approach but it works for me. For this project specifically, I put a lot of thought into making the descriptions actually interesting to read because of my personal experience. To be honest, I get really bored from art museum labels… I read a couple, maybe some, and then just start looking at the art without reading anything. I didn’t want that to happen with our display. That’s why I tried to make each description quirky and approachable. For example, instead of just saying “this is a mathematical surface,” I’d explain why it looks like a sombrero and how you could make your own. The goal was to make someone walking by actually stop and read, not just glance and move on.
The struggle is that I make a lot of edits. I’ll write a description, think it’s okay for now, then rewrite it three times because it sounds too formal or too casual or not interesting enough. I also ask for a lot of feedback — I sent revised descriptions to the students whose work I was describing to make sure I wasn’t misrepresenting their projects. That back-and-forth helped me find the right balance between being accessible and being accurate.
Looking back at my documentation now, trying to imagine I’m someone new seeing these descriptions, I think they do a pretty good job of capturing what each print is about while keeping things engaging. Some of them might need tweaking once we actually put them up and see how people respond, but overall I’m content with how they turned out.
My general approach to documentation is to write what you’d want to read. If I’m bored writing it, someone else will definitely be bored reading it. For these display descriptions, that meant adding personality, asking questions, and connecting the prints to real-world applications people might care about. It’s not the most efficient process since I revise so much, but I think the end result is worth it.
The hardest part is knowing when to stop editing. At some point you just have to accept that it’s good enough and move on, which is something I’m still working on. (This is why I don’t like writing papers and have never taken an English class here).
Sample
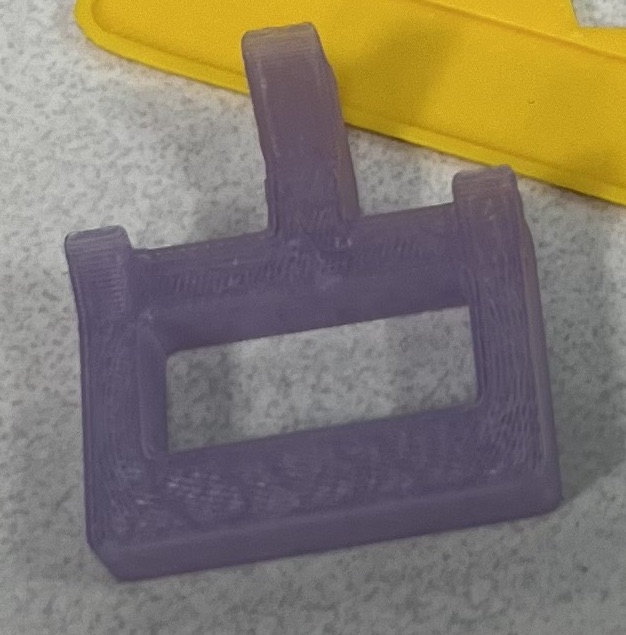
Title: Upcycled Bike Touring Straps Creator: Ethan Versh ’27 Description: A sustainable approach to bike touring gear, these straps combine 3D-printed buckles (from an online STL file) with recycled bicycle inner tubes and contact cement. This project demonstrates how 3D printing can be integrated with traditional materials and upcycling to create functional, custom equipment. (Source)
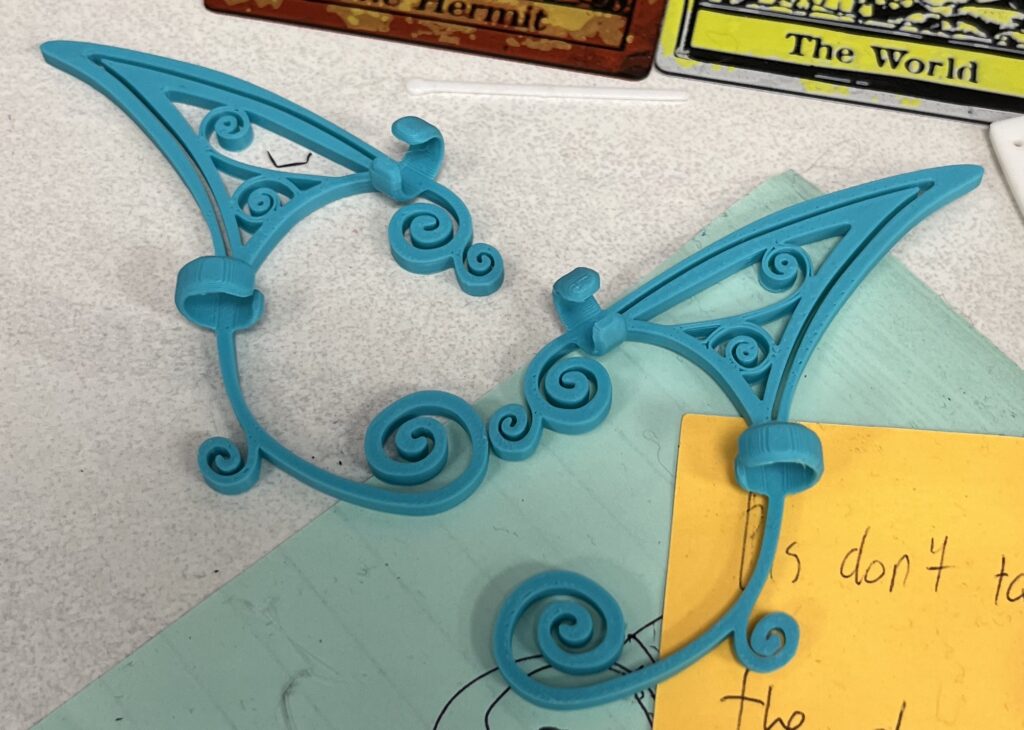
Title: Elven Ear Cuff Description: Instant elf transformation, no piercing required! This clip-on ear cuff demonstrates how 3D printing can produce delicate jewelry with intricate details. The swirling design would be challenging to craft by hand, but a 3D printer recreates it perfectly. Custom jewelry and cosplay accessories are now just a print away! (Source)
This month, I focused on researching Blender. I wasn’t able to start hands-on work because I lost my mouse, but I spent time learning how Blender actually works and what I’ll need to be comfortable with before diving in.
Through my research, I learned about Blender’s core workflow: model -> material -> light -> render. Understanding this pipeline helped me see how projects move from a simple mesh to a polished final image. I also explored the basics of viewport navigation, common shortcuts, and the importance of using modifiers like Mirror, Subdivision, and Solidify to speed up modeling.
I looked into Blender’s two render engines (Cycles for realistic lighting and Eevee for fast previews) and how each is used in different types of work. I also learned that lighting (especially using HDRIs) can really improve a scene even when the model is simple. Finally, I got a better sense of what beginners typically tackle first, e.g., modeling basic objects, setting up simple materials with the Principled BSDF shader, and creating clean, well-lit renders.
Even without hands-on practice yet, this research gave me a solid foundation. Next month, once I have my setup ready, I’m hoping to apply what I’ve learned and start building my first small scene in Blender!
For this month’s deliverable, I chose to peer review and build out additional sections for the Audacity training. After going through the training again and thinking about what would actually help future Fellows, I added three new sections — keyboard shortcuts, troubleshooting, and file format guidance.
The keyboard shortcuts section is basically a cheat sheet organized by task type so you can quickly find what you need. The troubleshooting section covers all those annoying beginner problems like your mic not being detected or audio sounding muffled. And the file formats section explains when to use MP3 versus WAV and what all those bitrate settings actually mean.
Writing these taught me that creating training materials is way different from just knowing how to use a tool. You have to think about where people will get stuck and explain solutions in a way that’s actually helpful. I tried to keep everything straightforward without being too technical, which was harder than I expected. It took me much longer than I expected.
I’m still not totally sure if the sections I wrote are too long, but my supervisor liked them, so hopefully they’ll be helpful for future Fellows working on podcasts or oral history projects!
The training already covers the essentials—navigating the toolbar, recording audio, selecting and trimming tracks, adjusting volume, copyright, etc.
The training itself is pretty solid. It has a clear, logical progression from installation to export, good visual aids, and a practical focus on tasks Fellows will actually need. I especially appreciate that it includes an accessibility section since that’s often overlooked. That said, I think it could use a more robust troubleshooting section specifically for recording issues – microphone not detected, audio sounding muffled, that kind of thing. These are super common first-time frustrations. Adding a quick reference guide of keyboard shortcuts would also be helpful since they save so much time once you learn them (e.g, Ctrl+Z for undo). Maybe you could also include a brief section on file formats too, explaining when to use .mp3 versus .wav and what bitrate settings mean for quality and file size?
For leveling up, I’d recommend future fellows focus on multi-track editing (good for podcast production), noise reduction (this can really improve audio quality!). Also, equalization (EQ) helps make voices sound clearer and more professional. Beyond that, learning to use labels to mark sections of long recordings would be incredibly helpful for oral history projects, and getting used to the Envelope Tool for precise volume adjustments would be good too.
Audio editing is one of those skills where you learn best by doing and by making mistakes, so I’m glad that the Vivero training involves messing around with it! I think overall, the training provides a strong foundation, and with a few additions focused on troubleshooting and intermediate techniques, it would give Fellows everything they need to produce professional-quality audio projects!
I’ve always considered myself as more of a “software girly” — I was used to solving problems through code on my computer. But Vivero has pushed me into unfamiliar territory which I think has been my biggest area of growth so far!
Learning how to use most of the hands-on tools found in the Burling basement (3D printers, Cricut machines, etc.) has been a complete shift from my comfort zone, but it’s been such a refreshing change of pace. There’s something deeply satisfying about creating something physical after years of working purely in digital environments.
For areas of weakness, I find myself being overly cautious with expensive or unknown hands-on equipment (due to my lack of experience with hardware). My hesitation sometimes holds me back from fully exploring what these tools can do.
Without a doubt, learning how to use the 3D printers has been my favorite discovery as a Vivero fellow. There’s something magical about watching a picture from a digital file transform into a physical object, layer by layer. The process appeals to both my technical side (optimizing print settings, troubleshooting issues) and creative side (endless possibilities).
Considering what I’ve gotten good at, what I’d like to improve, and what I’ve enjoyed learning, I want to focus my professional development on becoming truly comfortable with our new H2D printer. This machine represents the perfect intersection of my interests – it’s technically challenging while offering incredible creative possibilities beyond just printing. Specifically, I want to
Make reliable, clean prints
Learn proper maintenance: replacing left-hand filament and swapping nozzles
Learn how to remove the nozzle attachments to replace with a pen for pen plotting
Experiment!
My first priority is getting comfortable with standard 3D printing on the H2D. I want to build a solid foundation before exploring advanced features. The first step is simple — just have more practice!
While it might seem like a basic choice compared to the other technologies we covered, I selected Excel because I know I’ll use repeatedly throughout my career. I realized that while I can navigate Excel’s basic functions, I haven’t fully explored its more powerful features that could make me significantly more efficient. The original training did a solid job covering fundamental formulas and basic data manipulation. However, I think it could be improved by proving more real-world datasets. The examples were clean and simple, but messy, realistic data would better prepare us for the “real world”. Showing how Excel works alongside other tools (importing from databases, exporting to other applications) would be valuable. I also wish the training mentioned more keyboard shortcuts.
This refresher reinforced that sometimes the most “boring” skills are actually the most practical ones. This semester, I want to focus on building a toolkit of versatile skills that complement my technical programming abilities.
With a semester of Vivero experience under your belt, what advice do you have for new Fellows about the idea that this job involves learning how to do your job on the fly?
Just go for it! Honestly, it seems intimidating at first but once you get the hang of it, it’s not that bad—and the tutorial is literally designed to walk you through everything. I actually think learning on the fly is the most fun part of the job anyway. Plus it’s great practice since many jobs in the real world will have you figuring things out as you go. If you have any questions, just ask the other Vivellos around you! Everyone’s super helpful and we’ve all been there.
What are the most important things you’ve learned this semester? What advice would you give your past self about becoming a Vivero Fellow and learning how to do this work? What worked and what didn’t work for you? What stuck with you? Are there things you found confusing or not helpful? What are your next steps for project work next semester? What documentation have you created, and what documentation do you still need to create? What digital scholarship topics, methods, or tools might you be interested in exploring next semester, or in the future?
One of the most important things I’ve learned this semester is how to use WordPress and how to become more of a problem solver. Most of the tools are actually pretty intuitive once you start exploring on your own. I learned not to let the fear of unfamiliarity hold me back. If I could give my past self advice about becoming a Vivero Fellow, I would say to not stress too much beforehand—it’s okay not to know everything right away, and you’ll learn by doing.
Through this experience, I also discovered how I learn best. I’ve realized that I retain information more effectively by actively using the tools, rather than sitting through tutorials or following step-by-step instructions. For instance, when I was learning WordPress and Audacity, it made a big difference to simply click around and experiment on my own. Although I found some applications confusing or even frustrating at times—especially WeVideo and occasionally WordPress because of their UX and interface design—I still managed to figure things out eventually by tinkering. The tool that really stuck with me the most was Audacity, partly because I completed the training twice, which gave me extra time to internalize how it works.
Next semester, I’m especially curious about exploring Beaver Builder. I’ve heard it’s a more user-friendly and flexible alternative to WordPress, and I think it might suit my style of learning and creating better. I’d also like to explore more tools related to web design and layout—something that will give me more creative freedom without being annoying to use. I enjoy platforms that allow for a bit of coding or logic-based thinking, but are still manageable without having to write code from scratch.
In the future, I’d like to explore more digital scholarship tools and methods that involve building or customizing websites, as well as those that allow for creativity and flexibility. Maybe something that will allow me to code more, but is maintainable without code? I’m especially interested in tools that let me experiment visually and figure things out through trial and error, since that’s how I learn best.